

The rapid evolution of mobile security architectures has made Factory Reset Protection (FRP) an indispensable standard for safeguarding modern smartphones against unauthorized access. Designed as a robust anti-theft mechanism across the Android ecosystem, FRP ties a device directly to its original owner’s Google account credentials following a hard reset. While this feature effectively deters malicious actors, it frequently introduces complex hurdles for legitimate technicians, secondary market refurbishers, and device owners who find themselves locked out of their own hardware. For devices driven by Spreadtrum—globally recognized today as UniSoc—chipsets, navigating this security barrier requires specialized engineering utilities. Among the most reliable instruments available for this task is the SPD Research Tool, a multi-functional debugging environment that empowers professionals to isolate, modify, and repackage firmware components without resorting to full, high-risk software re-flashing procedures.
To fully grasp the utility of this procedure, one must first understand the fundamental role of the SPD Research Tool within the broader landscape of mobile device maintenance. Historically engineered as an internal diagnostic and flashing utility for Spreadtrum and UniSoc platforms, the application serves as a direct bridge between a Windows-based workstation and the target hardware. Unlike consumer-facing installers, the Research Tool is designed for deep firmware manipulation, enabling users to interact directly with individual storage partitions contained within standard .pac firmware packages. By loading these proprietary packages, technicians can inspect partition maps, adjust flashing parameters, and execute targeted modifications. This granular level of control is precisely what makes the utility invaluable for bypassing security locks, as it allows for the extraction and reconfiguration of specific system sectors responsible for authorization states.
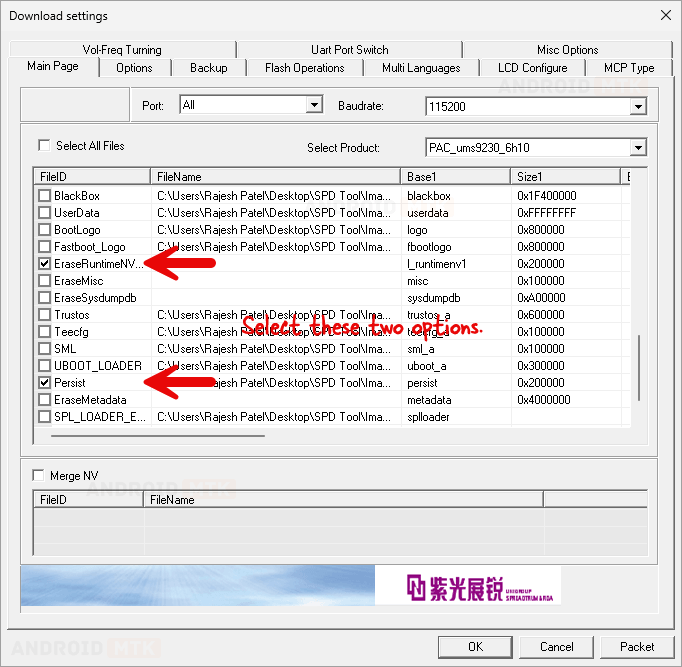
At the heart of bypassing Google account verification on UniSoc devices lies the concept of the custom FRP file. A standard stock ROM package contains an exhaustive collection of partitions that govern everything from core boot loaders and radio frequencies to user interfaces and recovery environments. Flashing an entire stock package merely to clear an account lock is not only time-consuming but carries inherent operational risks, including potential baseband corruption, data mismatches, or unintended version downgrades. Conversely, a dedicated FRP file functions as a streamlined, highly specialized .pac container. Instead of encompassing the entire software stack, this targeted file isolates and interacts exclusively with the specific partitions tasked with storing security credentials and runtime flags—most notably the Persist and EraseRuntimeNV partitions. By engineering a file that targets solely these designated sectors, technicians can execute a surgical intervention, wiping away the persistent account association while leaving the remainder of the operating system completely untouched.
Before undertaking the process of generating an FRP reset file, strict adherence to foundational prerequisites is vital to ensure structural integrity and operational success. First and foremost, technicians must acquire an authentic, uncorrupted stock .pac firmware package that corresponds precisely to the exact make, model, and hardware revision of the target device. Mismatched firmware can result in severe partition structural errors during the eventual flashing phase. Additionally, a stable Windows workstation equipped with the latest Spreadtrum/UniSoc USB serial drivers must be prepared to ensure seamless communication between the software environment and the local filesystem. A working installation of the SPD Research Tool, preferably a recent stable release, must also be properly configured on the host machine. Because this procedure involves low-level data manipulation, maintaining an uninterrupted power supply and a reliable computing environment is essential to prevent data corruption during the custom packeting sequence.
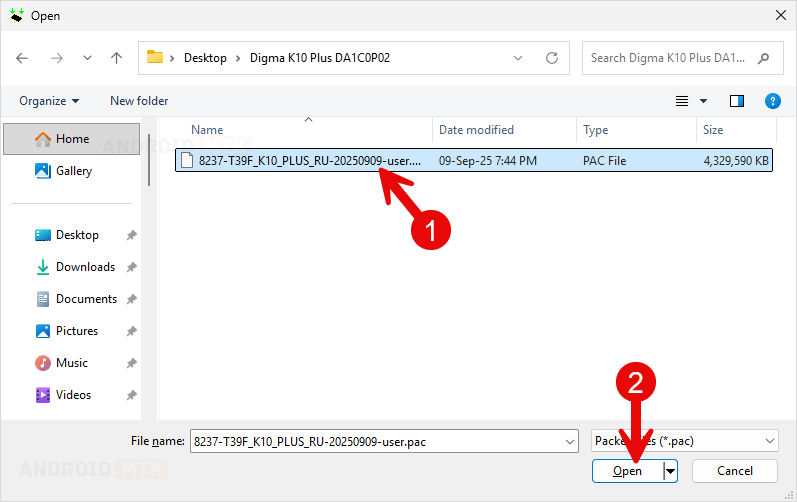
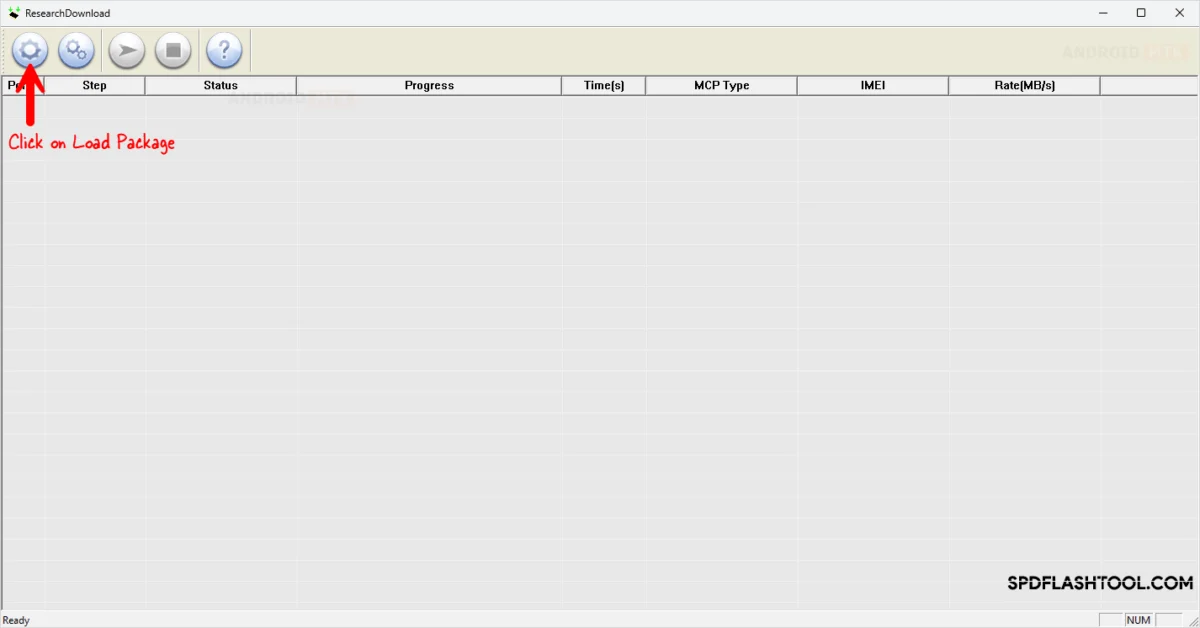
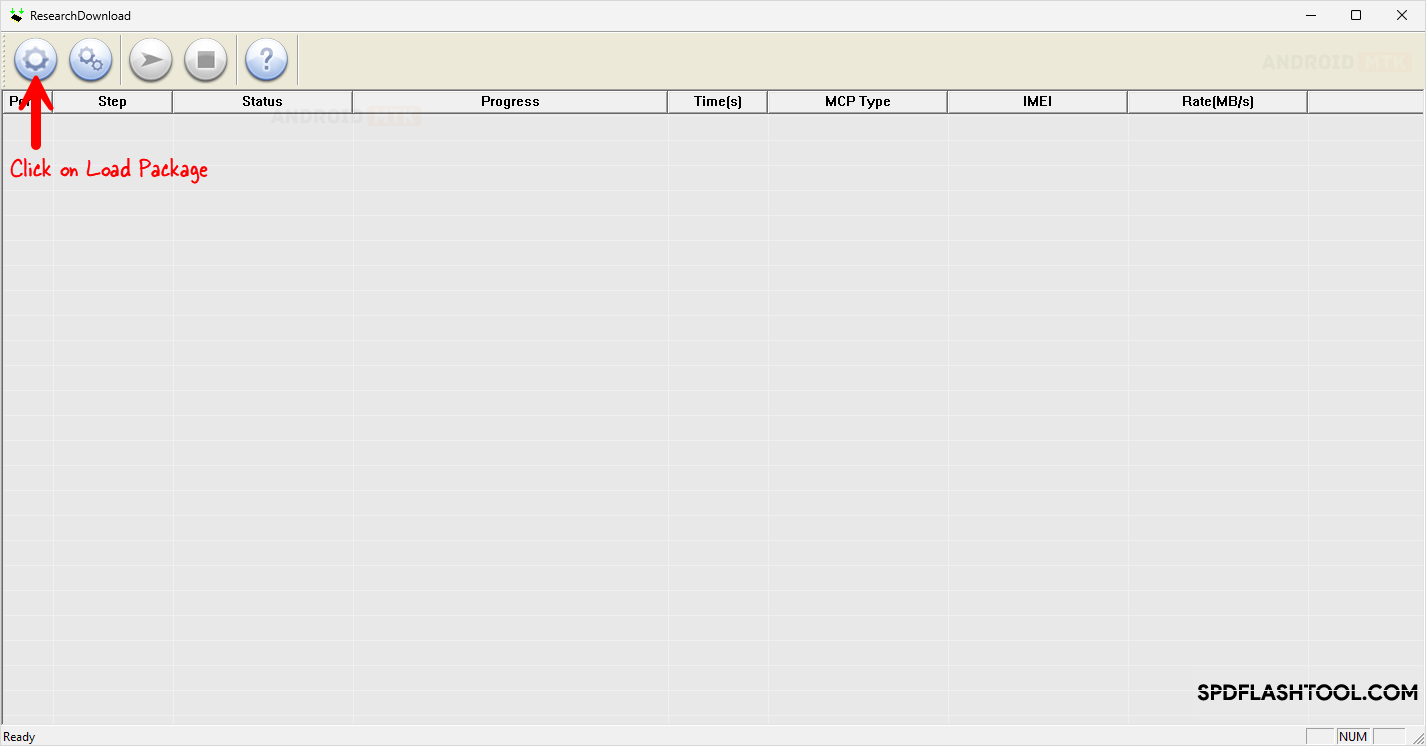
The journey to generating a customized FRP package begins with the initial deployment and setup of the SPD Research Tool on the host computer. Upon launching the application, the primary interface presents a clean, utilitarian workspace designed for firmware ingestion. The first major operational step requires loading the previously downloaded stock .pac firmware package into the program. This is achieved by clicking the prominent "Load Packet" icon—typically represented by a gear or folder symbol—and navigating the local directory to select the correct firmware archive. Depending on the size of the .pac file and the processing capabilities of the host workstation, the software may take a brief moment to parse the complex internal directory structure, unpack the manifest, and populate the interface with the complete list of constituent partitions and their associated binary images.
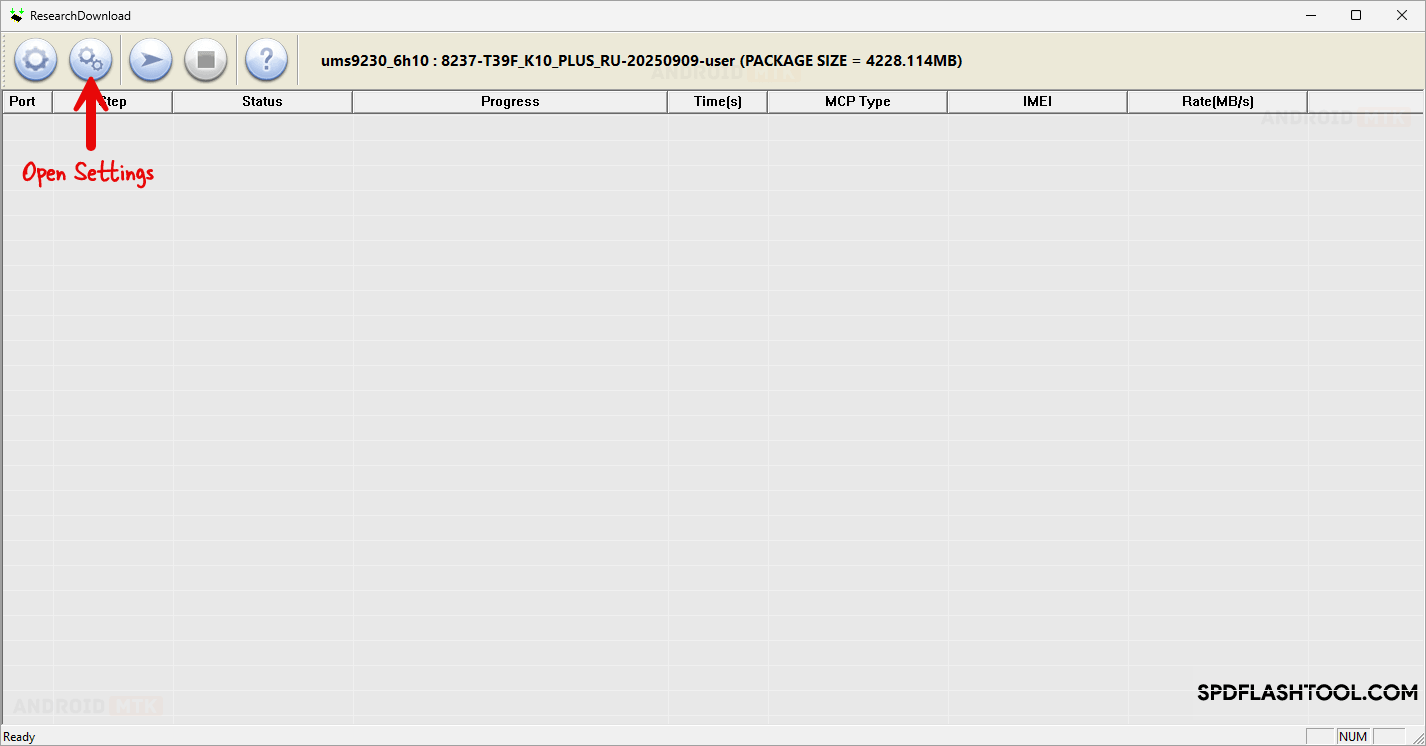
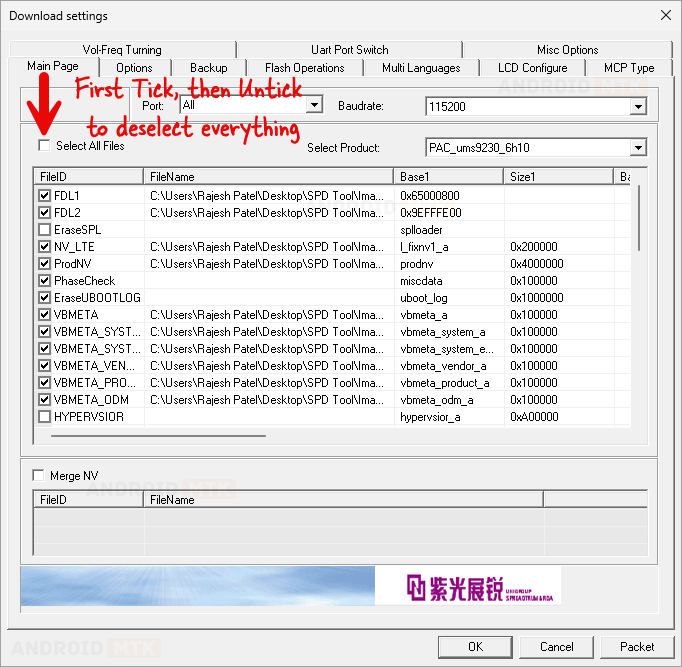
Once the firmware package has been successfully ingested and validated by the application, the user must access the configuration settings to begin isolating the security parameters. This is accomplished by opening the "Download Settings" menu, an area where the flashing behavior of individual partitions is strictly controlled. By default, the software is configured to write all listed partitions simultaneously during a standard flash operation. To transform this environment into a custom file generator, the technician must first systematically untick or deselect the master checkboxes governing the entire package. Following this global deselection, the user navigates specifically to the partition list to locate and isolate the elements responsible for credential storage, primarily checking the boxes adjacent to the Persist, EraseRuntimeNV, or equivalent security-related image entries, depending on the specific UniSoc chipset architecture in use.
With the necessary security partitions isolated and selected within the configuration menu, the workflow transitions from a standard flashing configuration to a custom packaging operation. This phase requires utilizing the specialized packeting tools integrated within the software’s settings architecture. Instead of directing the tool to execute an immediate hardware write sequence, the parameters are adjusted to instruct the utility to compile the selected partitions into a brand-new, standalone container file. The user must designate a distinct nomenclature for this output file—clearly identifying it as an FRP bypass or reset package for the specific device model—to prevent any confusion with the original stock firmware. Initiating the packeting command prompts the software’s internal compiler to extract the designated binary images from the loaded .pac archive and bundle them into a unified, lightweight file format.
The final stage of the generation process involves monitoring the software interface as the compilation routine executes. The SPD Research Tool provides real-time status updates and progress indicators throughout the packeting cycle, ensuring transparency as the binary data is processed and written to the designated destination directory on the host workstation. Once the status notification confirms that the packeting procedure has reached successful completion, the user can safely close the configuration window and exit the compilation environment. The resulting file now stands as a dedicated, highly efficient FRP reset tool tailored exclusively for the target device architecture. Technicians can subsequently load this newly minted custom file back into the Research Tool or compatible flashing utilities to clear stubborn Google verification locks rapidly, cleanly, and without the complications associated with full firmware deployments.
