

Encountering a system interruption while updating firmware on Spreadtrum—internationally recognized as UniSoc—chipset-powered mobile devices can quickly turn a routine software maintenance procedure into a technical headache. Among the various error codes that can disrupt this process, the NV-W, or Non-Volatile Write error, is one of the most frequently reported hurdles by technicians and advanced Android enthusiasts alike. This specific failure occurs precisely when the SPD Research Tool attempts to write critical non-volatile data blocks to the device’s internal storage memory. Because non-volatile storage houses indispensable hardware identifiers, including unique calibration data, network configuration parameters, and crucially, the International Mobile Equipment Identity (IMEI), any disruption or rejection during this writing phase halts the entire flashing operation to prevent permanent hardware bricking or deep system corruption.
To understand why this error manifests, one must examine how the underlying architecture of Spreadtrum and UniSoc processors manages firmware deployment. When utilizing the SPD Research Tool to flash an official .pac firmware package, the utility systematically parses and writes multiple partitions, ranging from the bootloader and system image to specialized security and calibration sectors. The NV-W error typically rears its head when there is an incompatibility between the deployed firmware package and the target hardware revision, when the tool itself is operating on an outdated software build, or when essential USB communication drivers fail to transmit data packets reliably. Furthermore, if the specific NV or ProdNV partitions within the firmware container are locked, corrupted, or formatted in a manner that the connected device’s security protocols reject, the flash utility aborts the sequence and triggers the NV-W warning code. Addressing this problem requires a methodical approach that bypasses the writing conflict while preserving the integrity of the broader operating system installation.
Before embarking on any advanced firmware modification or troubleshooting procedure, establishing a secure and stable operational environment is paramount. Technicians must ensure that their Windows host computer is equipped with the correct, digitally signed Spreadtrum USB drivers, as communication dropouts over the serial port frequently mimic storage-level write failures. Additionally, verifying that the downloaded .pac firmware file matches the exact regional and hardware variant of the target device prevents partition mismatch issues. Because modifying core system partitions carries inherent risks—such as temporary device unresponsiveness or complete data loss—users must proceed with absolute caution, maintaining an uninterrupted power supply, utilizing certified USB cables, and connecting directly to motherboard-level USB ports to eliminate latency and interface instability.
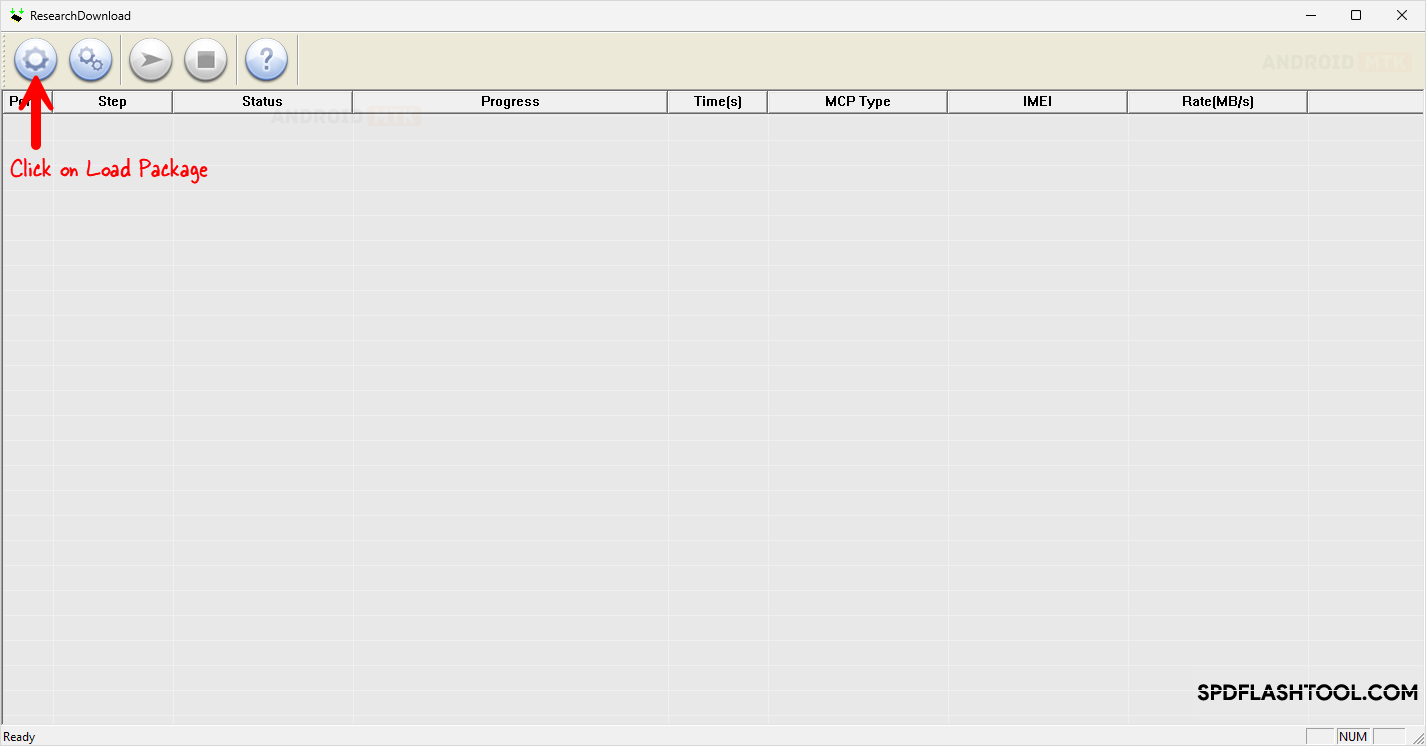
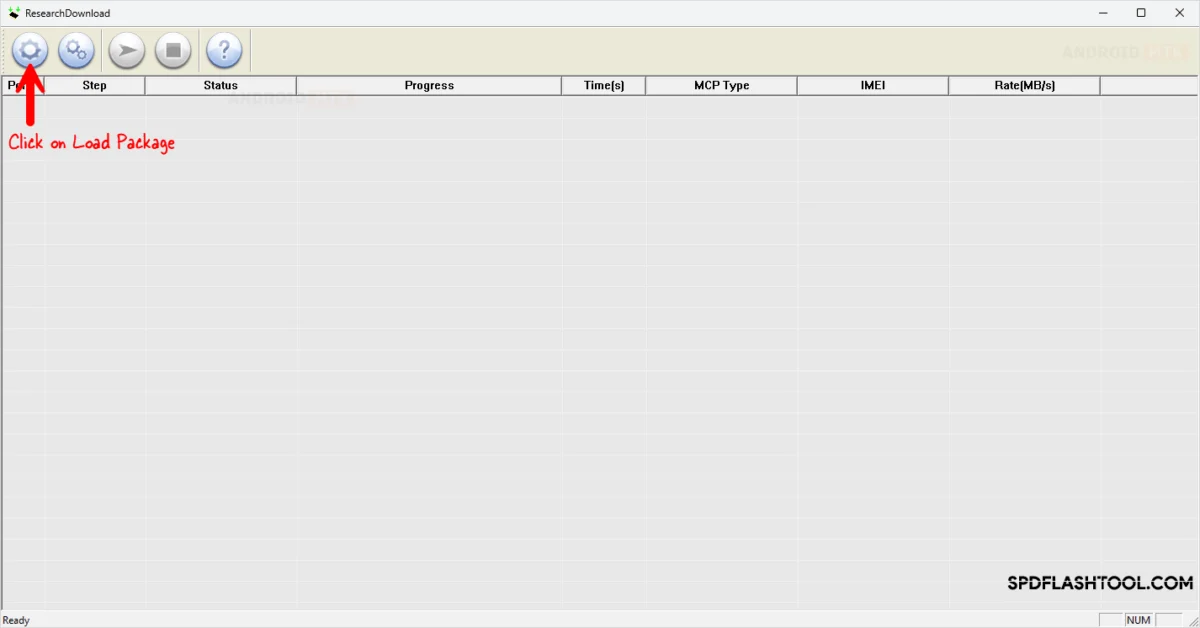
The process of overcoming the NV-W error within the SPD Research Tool involves reconfiguring the package settings to temporarily exclude or bypass the problematic non-volatile data writing phase, thereby allowing the core system, vendor, and user-space partitions to flash successfully. The remediation procedure begins by launching the SPD Research Tool on your Windows workstation. Once the application interface is fully initialized, the technician must load the correct .pac firmware package corresponding to the target device by utilizing the "Load Packet" function. The application will spend a few moments parsing the compressed firmware archive, unpacking the various structural components and displaying the file structure hierarchy within the workspace.
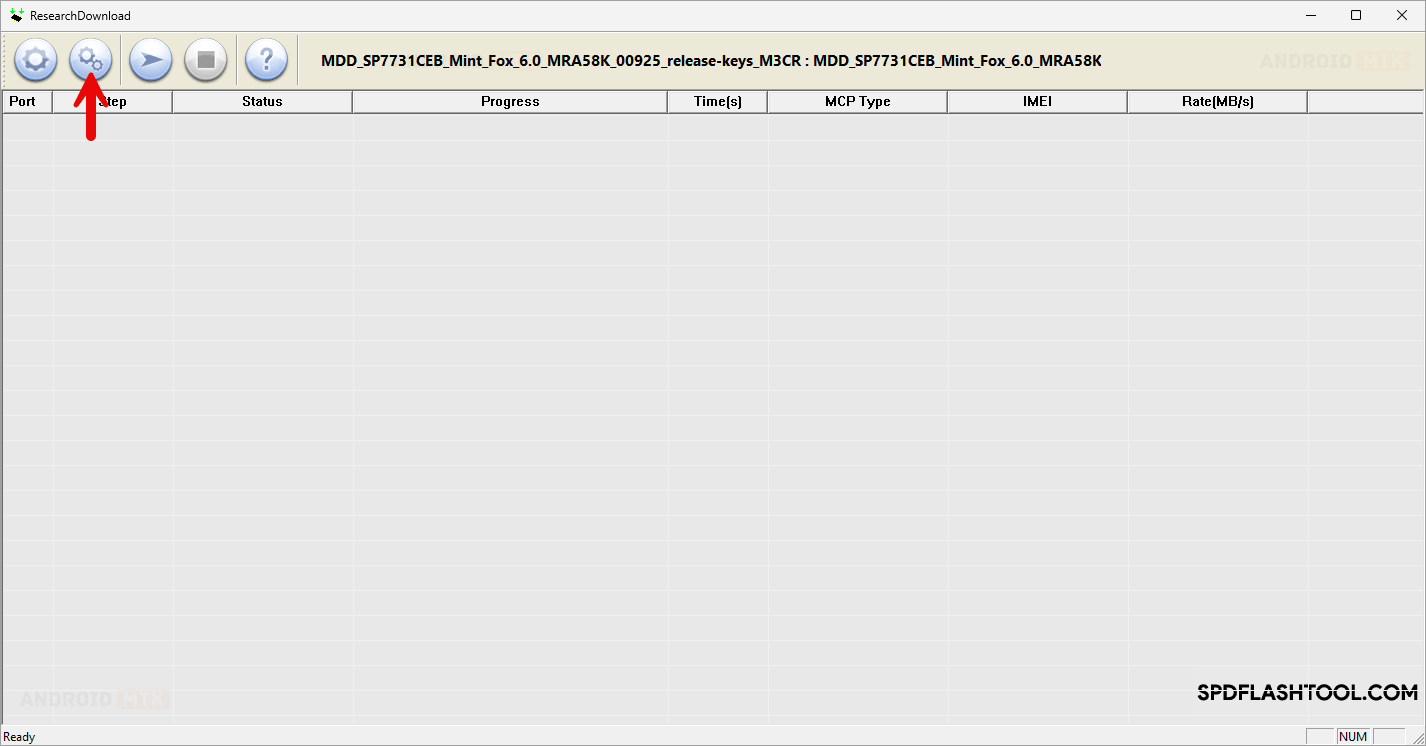
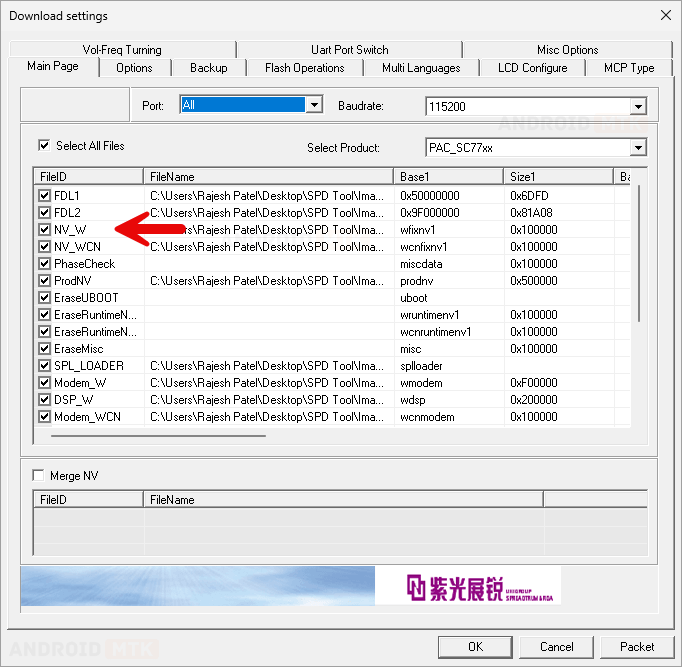
Following the successful importation of the firmware package, the next critical phase involves accessing the tool’s internal parameter settings to modify how individual partitions are handled during the flashing sequence. By clicking on the "Settings" icon—typically represented by a gear or configuration symbol near the top toolbar—users open the comprehensive parameters menu. Within this dialogue box, navigate to the main partition selection tab, where every individual image contained within the .pac file is listed with a corresponding checkbox. To mitigate the NV-W failure, the technician must carefully locate and deselect any entries related to NV, ProdNV, or specialized calibration blocks. Deselecting these specific parameters instructs the utility to write the operating system, kernel, and driver modules while leaving the device’s existing non-volatile storage sectors untouched, thereby avoiding the write rejection altogether.
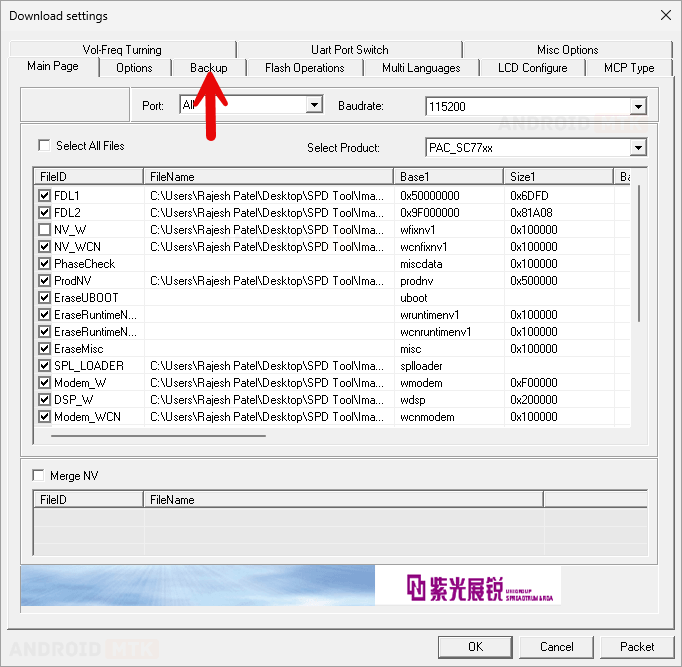
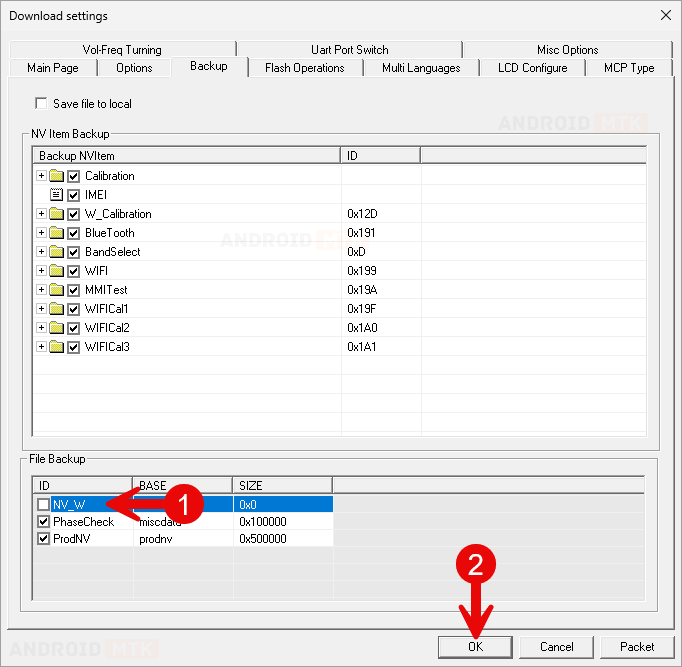
In many iterations of the firmware package, non-volatile data handling is mirrored across secondary backup directories within the software environment. Consequently, thoroughness dictates that the user must also navigate to the "Backup" or secondary configuration tab within the settings menu. Here, a parallel list of partition checkboxes will appear, often containing corresponding backup images for the NV and security blocks. Just as performed in the primary settings menu, these backup NV-related checkboxes must be systematically deselected. Ensuring that both primary and backup NV write operations are disabled eliminates the possibility of the tool triggering a secondary write conflict halfway through the flashing procedure, ensuring an uninterrupted data transfer pipeline.
Once the troublesome partitions have been successfully excluded from the flash queue, apply the configuration changes by clicking the "OK" or "Save" button to return to the primary dashboard of the SPD Research Tool. At this stage, initiate the flashing sequence by clicking the "Start Downloading" or "Play" icon, placing the utility into an active listening state where it awaits a handshaking signal from a compatible device. Take your powered-down target device, hold down the designated volume or boot-rom hardware keys—typically Volume Down or both volume keys simultaneously—and connect it to the computer using a secure, high-quality USB data cable. The SPD Research Tool will instantly recognize the device via the pre-installed Spreadtrum bootloader interface, establishing a secure serial connection and immediately commencing the multi-stage flashing process.
As the deployment progresses, observe the live status bar within the utility window. Without the obstruction of the conflicting non-volatile write commands, the tool will rapidly process and deploy the system, product, vendor, boot, and recovery images without interruption. The process typically takes a few minutes, during which time the USB connection must remain completely undisturbed to prevent data packet corruption. Once the progress bar reaches completion and displays a glowing green "Passed" or "Success" notification, the primary flashing phase is officially finished. At this juncture, users can safely disconnect the mobile device from the computer workspace. Perform a hard system reboot by holding down the power key, allowing the device to initialize its newly installed operating system environment. Upon booting up, the device will interface smoothly with its existing non-volatile calibration parameters, restoring full operational functionality, network connectivity, and system stability without encountering the dreaded NV-W flashing halt.
